Radiator Stripping-Our Story
I actually started this post before the "air compressor incident." Little did I know the air compressor would be stolen before I finished it!
Anyway, I feel like we are exploring every single possibility to remove the paint off our radiators. We are making some progress, but it is slowgoing. We did prime one radiator (which is the one documented below)
Method 1- Pressure Washing
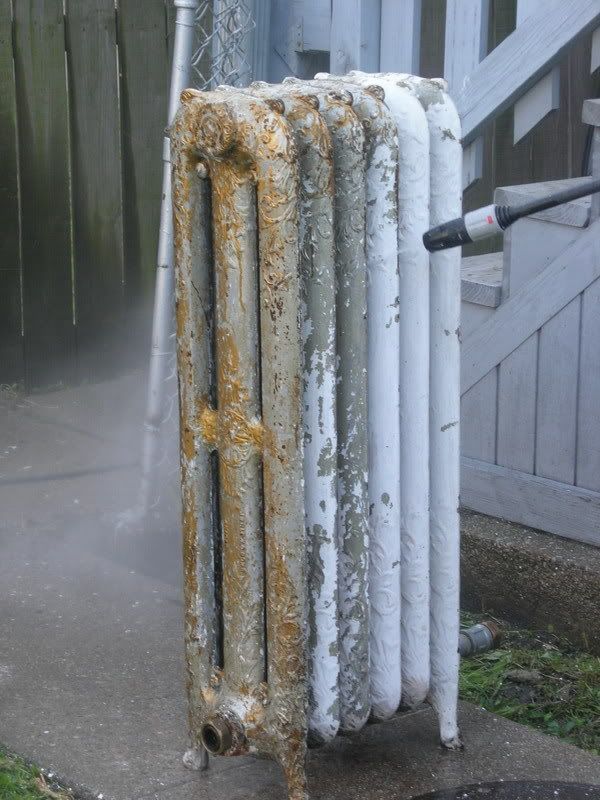
I think this offered the most bang for the buck. (in terms of least messy with quickest results) We first used our pressure washer on 2 of our radiators, and were able to get all of the top coat off, and various layers below to primarily the "first" paint coat, a bronze color. It took us a few hours to do this with our electric pressure washer. (one of the more basic models). With a gas powered pressure washer, or just a generally more powerful one, the results may have been quicker and more complete. This photo shows the power washing in action-it was completely white before we began working left to right.
After the initial huge success at getting a lot of paint off, our continued efforts had limited success...so on to step 2.
Method 2 - Old fashioned citrus stripper.
I actually didn't use this enough to give it a full report. In light of the disappearance of the air compressor, weather permitting I'll probably do more stripping. (didn't have the heart to do it last night). I did 2 courses of stripper on one side of one radiator. The first course of stripper, I probably didn't leave on for enough time, and only some paint came off. Second time, paint came off as well, but it wasn't significant (or compared to the pressure washer it seemed like nothing!). I think the best stripping bet is to tent it in plastic and leave it on for a longer period of time. This worked really well on the marble fireplace I stripped. I find though, that once you have a really great first initial removal of paint (in our case the pressure washing method), the incremental changes are less noticeable.
This photo shows after using the stripper.

Method 3- Sandblasting
Our final treatment of radiator 1 was sandblasting through an attachment to our former air compressor. This is by far the messiest,and I'd say the most tedious. (but also generally the most fool proof in getting the paint off by focusing on one area. The sandblaster acts more like an eraser, erasing each layer of paint. I easily then got the remaining paint removed. The interior portion of the radiator was difficult to reach with all the methods. I think it does a wonderful job of getting into the little crevices, but is probably best to be used after the majority of paint is removed. (which was the case after pressure washing).
Our first attempt on Sunday, we had "all purpose sand" and it would clog the intake hose-making work even more slow going. We went back to Home Depot and got "medium sand" from Quikrete, and things moved quicker. It was funny, because the Home Depot receipt listed "sandblasting sand" as the line item-however, neither the bag, nor any signage in the store indicated what the appropriate sand was for sandblasting. Hypothetically, we could have asked someone, but as usual, there wasn't anyone around. Also, the previous time we were in that department at that store, we asked about sawhorses and the Home Depot employee did NOT KNOW what a sawhorse was! (We were both rather astonished about that).
Oh, and a cautionary note that the sand is quite insidious. Be forewarned if you ever decide to sandblast.
They make combination pressure washer/sandblasters that would probably be the best bet.
Here's the sandblasting action shot:

(That is me in there somewhere! Under the mask, eye protection, hearing protection, and hat)
Post sandblasting (I would have worked for 15 minutes longer if the air compressor hadn't been stolen)
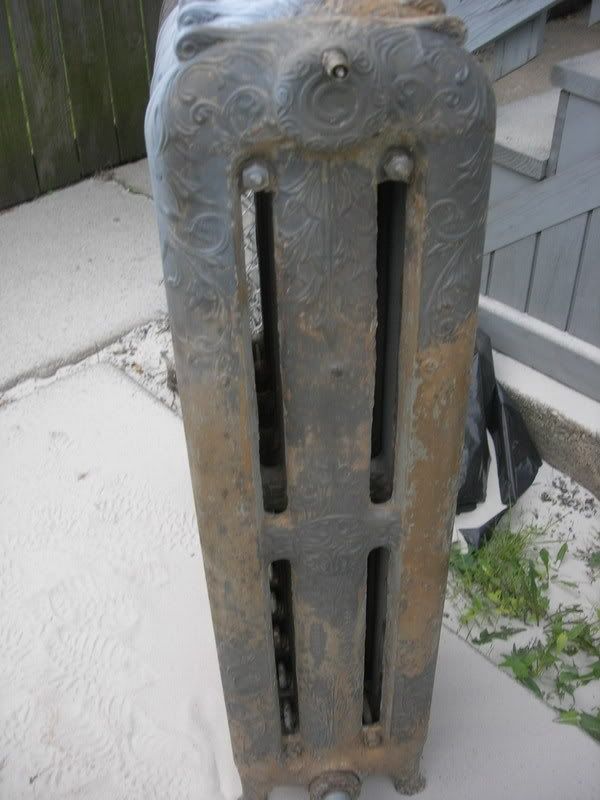
And, without further ado, our primed radiator!


Labels: pressure washing, radiators, sandblasting, stripping
posted by Christina at 8:51 AM
![]()
![]()


6 Comments:
Harbor Freight sells walnut shells and other medium for their sandblasting kits. Have you considered that? http://da.harborfreight.com/cpisearch/web/categorySearch.do
brent
http://710.hornberger.us
Hadn't heard of walnut shells (we are novices at this). Do they work much more efficiently than the sand?
I see they are 6 times as expensive as the sand-is it worth the cost?
Thanks for the tip!
I don't mean to be dense, but what do you mean by sandblasting being "inciduous"? I'm planning on using sandblasting and baking soda blasting to remove paint from some surfaces around here (soda for the brick and limestone with paint on it, sand for radiators etc) and would love to learn from your experience. Thanks.
Okay, I need to read what I write better before I click "publish" I meant the sand, and on second look, I think I misspelled the word insidious, and perhaps that is a poor word choice.
The point I was trying to make was,
I was pretty protected, but yet, I had sand everywhere. Under my goggles, etc. Definitely protect yourself and just assume that its in places even if you think you are protected. Don't go wash your hands than rub your eyes-go into the bathroom and check for sand on your face.
You can develop a false sense of security once you put on all that gear.
Also, since it is so messy-it is also not for the faint of heart. It does the job, but the work is slowgoing (in our case, with our equipment) We had an air compressor that was a 6 gallon tank, .8 running hp and 3 scfm. Our sandblasting attachment was for a compressor with 4.5 scfm. (we just used what we had on hand).
If you had a big project, and were buying the equipment, I'd suggest getting something more powerful.
It's really messy but does the job.
Sandblasting takes a large compressor, typically 20+ CFM. For small "spot" sandblasting jobs, a 5-10 CFM compressor will work. For cast iron, an industrial media like "Black Beauty" works best. You should be able to buy it at large welding supply stores. Remove any brass parts though, because the Black Beauty will cut into them pretty (VERY!) quickly. I'm sorry to hear about the compressor theft. :(
How did you contain the lead paint?
Post a Comment
<< Home